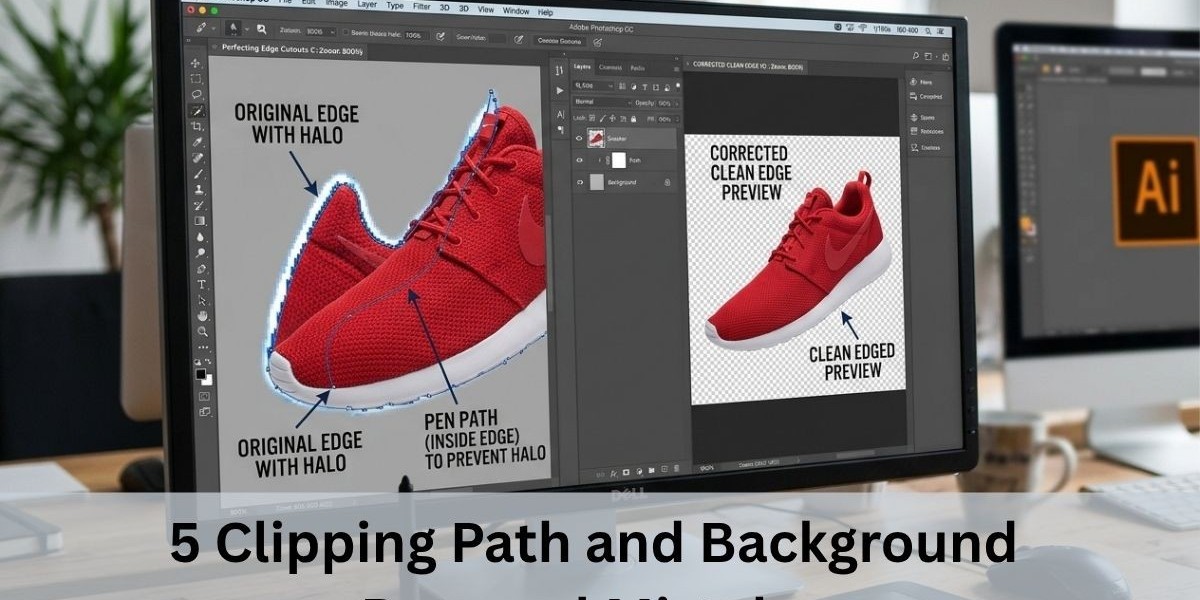

Great visuals are the motors behind contemporary ecommerce, digital publishing, and sound visual marketing. Product images that are clear and crisp, with good resolution, will create instant trust and brand authority in those first few seconds that a potential customer spends looking at your online store. This ideal look is almost entirely dependent on post-processing digital image editing. By using a professional clipping path service, the businesses can isolate product cleanly, remove distracting backgrounds, and display product catalogs consistently.
However, there are even minor mistakes that can make a high quality product look unprofessional after post-processing. Background removal services are now indispensable tools for any brand, but mishaps can quietly impact conversion rates. The following are the 5 most common mistakes and exactly how to fix them in photo editing.
Mistake 1: Rough Edges That Cut Off Fine Product Details
One of the most prominent post-processing errors is when fine edges are cut roughly. Use standard vector paths for objects with smooth, unchanging curves, like water bottles and electronics, or shoes. But when you're using a simple path to more elaborate products such as fluffy clothing, model hair, or textured jewelry, you get blocky cutouts, which will look obviously rendered.
How to Fix It:
When working with complex textures, get rid of strict paths and try a hybrid approach. Use the manual Photoshop Pen Tool to create hard line structural boundaries and the more powerful image masking tools, including channel masking and refinements-edge brushes for more organic textures. This guarantees that each fine strand or fine texture will retain its shape and not appear harsh.
Mistake 2: Visible Halos and Color Fringing Around Products
When taking a picture with a bright, colored, dark background, the light reflects back at the outside edges of the subject. When the subject is isolated on a clean white background, a thin line of the old background (called a halo or color fringe) is still visible around the perimeter, unless the light spill is corrected.
How to Fix It:
First, make sure to draw the path of the pen slightly within the actual outline of the object (about 1-2 pixels in) and not right on the outside edge. If ambient light spill persists, try the Photoshop De-fringe tool or use a Hue/Saturation adjustment layer and set its clip mask to the subject edge and select the hue that you want to neutralize.
Mistake 3: Removing Natural Shadows or Creating Unrealistic Ones
One often made mistake when isolating a background is to remove all natural light and shadows as the product then appears to be floating in mid-air. On the other hand, original studio shadows that are harsh, uneven, or messy can create a cluttered appearance of product displays across a store catalog.
How to Fix It:
To produce ground-based and realistic product photos, the main thing is to use soft, realistic shadow construction. While isolating, separate the subject, its shadow and backdrop into separate layers. When the shadow is too distorted, or no longer is required, arrange a shadow or reflection shadow layer under the subject with soft-gradient brushes and fine-tune the opacity settings.
Mistake 4: Inconsistent Product Size, Spacing, and Alignment
What might be a perfect picture of a single item will become immediately obvious as an inconsistency when juxtaposed with 50 other product listings. Typical execution problems range from products that have very different sized canvases to floating canvases, to products with different margins and angles on the same product line.
How to Fix It:
Set the canvas and cropping standards prior to beginning any batch editing project. Develop standard Photoshop files that have fixed margins, alignment guides and fixed canvas sizes (e.g. 2000 x 2000 pixels at 300 DPI, with a 10% padding boundary). An organized list of all subjects creates a professional, uniform catalog appearance.
Mistake 5: Relying Solely on Automated Selection Tools
Many editors make the error of not doing any manual precision work because of the fast growth of one-click background removers and automated AI selection software. Automated software performs well on clear, high-contrast images but often performs poorly in situations with subtle gradations, glass transparency, semi-translucent textiles, and soft edges.
How to Fix It:
Use automated selection tools as a starting point rather than an endpoint. Do always make a manual QC pass at 100% - 200% zoom. Use the Pen Tool to manually remove anchor points, refine jagged curve handles, and draw precise interior cuts (like handle loops or cuts in eyeglasses).
Final Thoughts
The art of post processing images is a fine art that demands attention to detail, technical mastery, and patience. You avoid jagged edges, out-of-focus color halos, create realistic shadows, ensure alignment, and combine these cutting-edge technologies with pen and paper vector tracing to take your product photography to the next level. If you are looking for studio quality catalog preparation on a large scale, work with a professional service provider such as Visuals Clipping for high quality images that will convey a strong visual impact for your brand.
Also Read: Simple vs. Compound vs. Multi-Clipping Paths