Introduction: You Did Not Buy an Embroidery Machine to Become a Digital Janitor
Let me paint a picture you probably know too well. You have a logo to stitch. You load the file. You hoop the fabric. You hit start. Three minutes later, the thread snaps. You rethread. You restart. Two more minutes, another break. The fabric starts puckering. The colors misalign. You spend forty-five minutes fighting a file that was supposed to make your life easier. By the end, you are out of thread, out of patience, and questioning every life choice that led you here. This is exactly why professional Embroidery Digitizing Services exist. Not because you cannot learn to digitize, but because your sanity and your thread are worth more than the fight.
I have watched home embroiderers and small shop owners burn entire days on bad digitizing files. They adjust tension. They change needles. They swap stabilizers. They try different thread brands. Nothing works because the problem was never their machine or their materials. The problem was the file itself. A bad file makes every other variable worse. A good file makes them all irrelevant.
Let me walk you through exactly how professional digitizing services save you from the madness, protect your thread budget, and let you get back to actually enjoying embroidery.
The Hidden Sanity Drain of DIY Digitizing
When you try to digitize a logo yourself or rely on auto-conversion software, you are not just learning a new skill. You are adding a full-time job to your already full plate. Here is what that actually looks like in real life.
You spend twenty minutes watching a tutorial on stitch angles. You spend another thirty minutes tracing your logo with the pen tool. You guess at pull compensation because the tutorial said something about 0.3 millimeters but your fabric feels different. You export the file. You run a test. The text pulls so badly it looks italicized when it should be straight. You go back to the software. You tweak the compensation. You run another test. The text improved but now the fill stitches are puckering. You adjust density. Another test. The puckering stopped but now the thread breaks every two minutes. You give up and start over from scratch.
That is not digitizing. That is digital janitor work. You are cleaning up messes created by inadequate tools and incomplete knowledge.
Professional digitizers skip all of that. They have already made every mistake you are about to make. They know that cotton pique needs 0.4 millimeters of pull compensation but caps only need 0.2. They know that performance knits need a heavier underlay than woven fabrics. They know that small text under six millimeters requires 60-weight thread and specific satin angles. You do not need to learn any of this. You just need to upload your artwork and wait twenty-four hours.
What Your Thread Goes Through in a Bad File
Your thread is not cheap. A good cone of polyester thread runs ten to twenty dollars. When a bad file causes thread breaks, you are not just wasting time. You are burning money.
Here is what happens inside a bad digitizing file. Stitch angles that go against the fabric grain create resistance. The thread drags, frays, and eventually snaps. Density settings that are too high pack stitches on top of each other. The needle punches through the same holes repeatedly, shredding the thread on fabric fibers. Trim commands placed poorly leave long jump threads that tangle and catch on subsequent passes. Underlay that is too light lets the fabric shift, which pulls the thread sideways and causes tension spikes.
A professional digitizing file eliminates all of these issues. Stitch angles are chosen to flow with the fabric grain or at optimal directions that reduce drag. Density is set precisely for your specific fabric and thread weight. Trim commands are placed only where needed, not randomly scattered. Underlay is matched to the fabric so the top stitches have a stable foundation.
The result is a file that sews smoothly from start to finish. Your thread feeds consistently. Your tension stays stable. Your needle lasts longer. And you use every inch of that expensive cone instead of throwing away half of it as thread nests and breaks.
The Test Sew-Out Loop from Hell
Here is the sanity killer that makes otherwise calm embroiderers want to throw machines out windows. You run a test sew-out. It fails. You adjust something. You run another test. It fails differently. You adjust something else. Another test. Closer but still not right. You are now three hours in and still not ready for production.
This loop happens because you are guessing. Without deep experience, you cannot look at a failed test and know exactly which setting to change. Is the text pulling because of compensation or because of stitch angle? Is the puckering from too much density or not enough underlay? Is the thread breaking because of tension or because the digitizer picked the wrong stitch type?
Professional digitizers break this loop entirely. They deliver a file that works on the first or second test sew-out. Their settings come from thousands of hours of real-world experience. They have digitized logos for cotton, fleece, caps, denim, leather, and everything in between. They know the exact starting points for each material.
When you work with a good digitizing service, your test sew-out is not a diagnostic exercise. It is a confirmation. You run it to make sure everything looks right, not to find out what is wrong. That shift from troubleshooting to verifying changes everything about how you feel at the end of a workday.
What Professional Digitizing Actually Looks Like
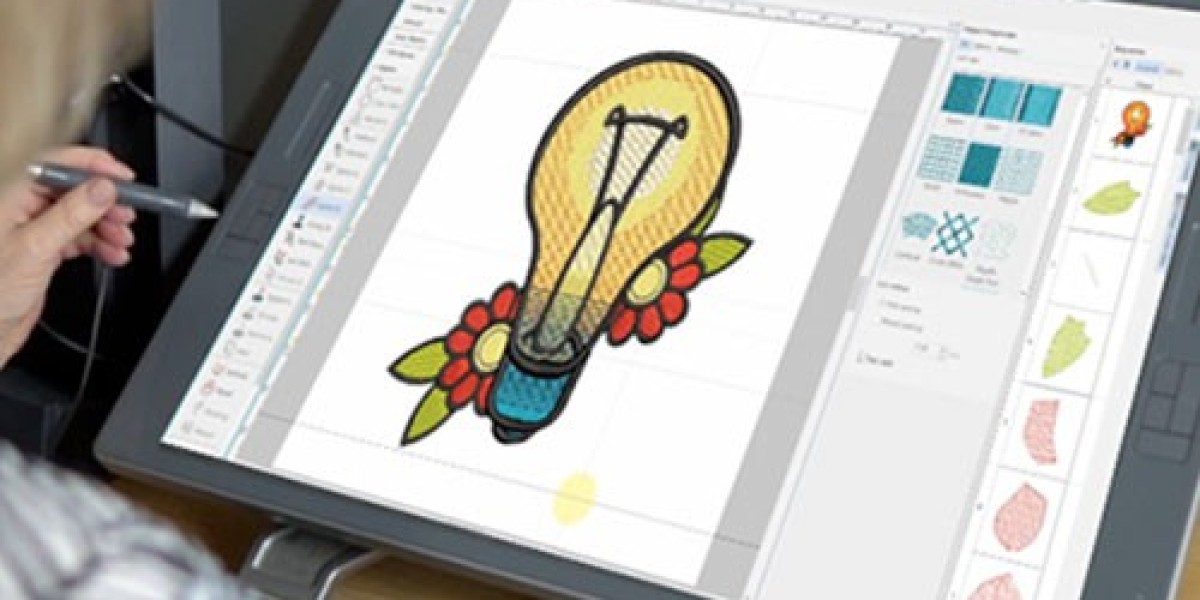
Let me demystify what happens after you upload your logo. A real human digitizer opens your artwork in professional software like Wilcom or Hatch. They do not hit an auto-convert button. They manually trace each element of your design.
They look at your logo and make dozens of decisions. Wide areas get fill stitches with specific densities. Narrow areas like letters and borders get satin stitches with carefully chosen angles. Fine details get running stitches. Underlay is added based on your fabric type. Pull compensation is applied differently to different parts of the design.
They set your color sequence to minimize thread changes and trims. Light colors sew first so dark colors do not show through. Large areas sew before small details so the machine does not jump back and forth across the hoop. Trim commands are placed only when necessary, usually after color changes and long jumps.
Then they run a simulation. The software shows exactly how the needle will move, where every stitch lands, and where the machine will trim. They watch for problems like long jump stitches that could snag or areas where density might be too high.
Only after all of that do they export your file in your machine's native format, usually .PES for Babylock and Brother machines or .DST for commercial machines like Tajima.
You never see any of this work. You just get an email with a download link and a file that sews cleanly.
The Real Cost Comparison
Let me do the math for you so you can see why professional digitizing saves both sanity and money.
A complex logo with small text and multiple colors costs around thirty to forty dollars from a professional service. You upload it. They send the file in twenty-four hours. You run one test sew-out. It works. You run your production run. Total time spent on digitizing? About ten minutes of uploading and approving.
Now try that same logo yourself. You need digitizing software. Hatch costs one thousand dollars for a perpetual license. Wilcom costs several thousand. Even the cheaper options like Embrilliance start at two hundred dollars for basic features. You spend two hours learning the interface. You spend two hours manually tracing the logo. You spend another hour tweaking settings and running tests. At a modest twenty dollars per hour for your time, that is one hundred dollars in labor plus the software cost. And your first three attempts still do not stitch right.
The professional service costs forty dollars. The DIY approach costs over one hundred dollars and leaves you frustrated. The math is not even close.
When You Should Still Consider DIY
I am not saying professional services are always the answer. If you digitize logos every single day as part of a high-volume embroidery business, learning to digitize yourself makes sense. You will eventually recoup the software cost through volume.
If you only need simple designs like single-color text or basic shapes, you can use free or low-cost tools like InkStitch. The learning curve is still there, but the stakes are lower because simple designs are harder to mess up.
If you genuinely enjoy learning new technical skills and have more time than money, go ahead and dive into digitizing tutorials. Some people find the process satisfying. I am not here to tell you not to learn.
But for everyone else, for the small business owner with orders to fill, for the home embroiderer who just wants to stitch a family logo without drama, professional digitizing services are the answer. They save your time, your thread, and your mental health.
What to Look for in a Service That Saves Sanity
Not all digitizing services deliver the calm, reliable experience you want. Here is what to look for.
They ask about your fabric. A service that does not ask what you are sewing onto is setting you up for failure. Fabric-specific settings are non-negotiable.
They offer free edits. Even the best digitizers sometimes miss something. A service that charges for every tiny adjustment will drive you crazy. Look for unlimited free edits within a reasonable window, like seven to fourteen days.
They provide a preview or simulation. Being able to see the stitch paths before you sew gives you confidence and catches obvious errors early.
They have real customer reviews. Look for reviews that mention specific machines and fabrics. A review that says they digitized for a Babylock on cotton fleece is more valuable than a generic five-star rating.
They respond to questions. Email them a question before you order. If they take three days to reply or give vague answers, imagine how frustrating they will be when you actually have a problem.
Conclusion: Your Sanity Has a Price Tag. It Is Lower Than You Think.
Embroidery is supposed to be satisfying. You take thread and fabric and turn them into art. The hum of a running machine, the rhythm of the needle, the reveal when you pull the hoop off and see your design complete. That is the feeling that got you into this hobby or business.
Bad digitizing files steal that feeling. They replace satisfaction with frustration. They turn your thread into a tangled mess and your patience into exhaustion. They make you wonder why you ever bought that expensive machine in the first place.
Professional embroidery digitizing services give that feeling back to you. They handle the hard part so you can do the fun part. They protect your thread budget by delivering files that sew cleanly. They protect your sanity by working on the first test.
So next time you have a logo to stitch, do not open digitizing software. Do not watch another confusing tutorial. Do not fight with settings you do not understand. Open your browser, find a trusted digitizing service, upload your artwork, and get back to doing what you actually enjoy. Your sanity and your thread will thank you.