Introduction: Why Logo Conversion Feels Like a Puzzle
You have a sharp logo. You own a reliable Pfaff embroidery machine. But somehow, getting that logo from your computer screen to actual thread and fabric feels like translating an ancient language. Sound familiar? You are not alone.
Convert Logo for Pfaff Embroidery Machines is not just a technical step—it is the bridge between your brand identity and a stitched masterpiece. Whether you run a small custom apparel shop or you are embroidering gifts for friends, the conversion process can make or break your final product. The good news? Once you understand a few simple rules, you will wonder why it ever felt hard.
This guide walks you through everything you need to know about custom logo conversion for Pfaff machines. No jargon. No fluff. Just honest, practical advice that helps you stitch like a pro.
What Makes Pfaff Embroidery Machines Special
Pfaff machines are known for their precision, speed, and the iconic integrated dual feed system. But when it comes to logos, they require a specific digital language. Most logos start as JPEG, PNG, or even PDF files. Your Pfaff, however, speaks in formats like PES, VIP, or VP3. These are not interchangeable without conversion.
Think of it this way: your logo is a recipe. The Pfaff machine is a chef. The conversion software is the translator that turns your ingredients into a dish the chef understands. Skip this step, and you end up with scrambled stitches, thread breaks, or a design that looks nothing like your original.
The Right File Formats for Pfaff Machines
Let’s get practical. What file types actually work on a Pfaff embroidery machine?
PES is the most common and reliable choice. It works across most Pfaff home and commercial embroidery machines. VIP is another solid option, especially for older models. VP3 is newer and supports more advanced stitch data. If you are sending a design to a professional digitizer, always ask for PES or VIP as your primary format.
Avoid sending raw image files like BMP, GIF, or even high-resolution PNGs. They might look great on screen, but without stitch data, your Pfaff machine will have no idea where to start or stop. You need a converted file that includes stitch types, density, underlay, and color change commands.
Manual vs. Automated Logo Conversion
You have two main paths here: automated software or manual digitizing.
Automated conversion tools sound tempting. Upload your logo, click a button, and boom—a file appears. And yes, for very simple logos with bold shapes and no fine details, auto-conversion can work. Think of a one-color geometric logo or a single line of text. But be warned: auto tools often struggle with gradients, small text, overlapping colors, or intricate illustrations. The result may be a messy stitch-out with uneven gaps.
Manual digitizing, on the other hand, is where the magic happens. A skilled digitizer (or you, with practice) maps each stitch by hand. They decide where to use satin stitches, where to use tatami fills, and how to adjust pull compensation so the final design does not warp on fabric. This takes more time, but it delivers professional results every time. For logos that represent your brand, manual conversion is worth every penny.
Essential Steps to Convert Logo for Pfaff Embroidery Machines
Let’s break down the actual process so you can follow along at home.
Step one: start with a clean vector file. Vector formats like EPS, AI, or SVG keep your logo sharp at any size. If all you have is a small JPEG, do not panic. You can still convert it, but the cleaner the source, the better the result.
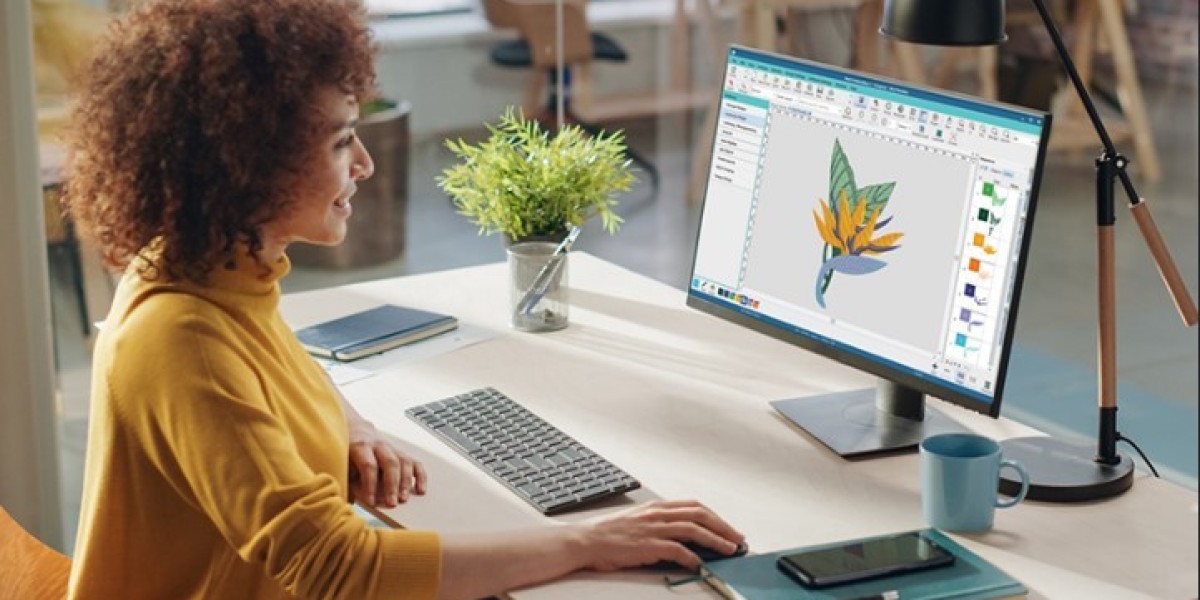
Step two: choose your embroidery software. Popular options for Pfaff users include Wilcom, Hatch, Embrilliance, and Pfaff’s own 4D Embroidery suite. Each has a learning curve, but many offer free trials. Watch a few YouTube tutorials, and you will pick it up faster than you expect.
Step three: resize your design carefully. Rescaling a logo in embroidery software is different from resizing an image on your phone. If you shrink a design too much, dense stitches will clump up and pierce the fabric. If you enlarge it too much without adjusting stitch density, you will see bare fabric between stitches. A good rule of thumb: do not scale a finished embroidery file up or down by more than 20 percent. Instead, go back to the original vector file and re-digitize for the new size.
Step four: set your stitch types. Outlines work great with satin stitches. Large filled areas need tatami or run stitches. Pull compensation (usually set between 0.2mm and 0.5mm) helps stop your design from narrowing on stretchy fabrics like polo shirts or caps.
Step five: run a test sew-out. This is non-negotiable. Use a piece of fabric similar to your final product. Check for thread breaks, gaps, or puckering. Adjust your tension and underlay settings as needed. A test sew-out takes ten minutes but saves you from ruining fifty shirts.
Common Mistakes and How to Avoid Them
Even experienced embroiderers mess up logo conversion sometimes. Here are the biggest traps and how to dodge them.
Mistake one: using too many small details. Tiny text (smaller than 6mm height) often looks messy because thread cannot bend that sharply. Simplify or enlarge small text before conversion.
Mistake two: forgetting underlay stitches. Underlay is a hidden base layer that stabilizes fabric. Without it, your logo will sink and look uneven. Always include a light underlay for knits and a heavier one for caps or jackets.
Mistake three: ignoring color order. Your Pfaff machine stitches in the exact order you set. If you forget to change thread colors in the right sequence, your logo will stitch pink over black and ruin the design. Map your color stops from bottom layer to top layer.
When to Hire a Professional Digitizer
Doing it yourself is empowering, but not every logo is a DIY project. If your logo has photos, gradients, extremely fine lines, or more than four colors, consider hiring a pro. A good digitizer charges between ten and twenty dollars per thousand stitches. For a standard logo of five thousand stitches, that is fifty to one hundred dollars. That small investment buys you clean stitch files, proper pull comp, and free test sew-outs.
Look for digitizers who specialize in Pfaff machines. Ask to see samples of their work on fabric, not just on screen. And always request the native editable file (like .EMB or .PES) along with your final stitch file. That way, you can make small tweaks later without paying again.
Free and Paid Tools to Get You Started
You do not need a thousand-dollar setup to begin. For free options, try Ink/Stitch (an open-source plugin for Inkscape). It has a steep learning curve but costs nothing. For paid software, Embrilliance Essentials is beginner-friendly and under two hundred dollars. Hatch Embroidery offers a thirty-day free trial with full features, enough time to convert several logos.
Pfaff also sells the 4D Embroidery Suite, which integrates seamlessly with their machines. It includes auto-digitizing, editing, and even a virtual sewing simulator. If you own a higher-end Pfaff Creative or Performance series, this software is worth exploring.
Conclusion: Stitch Smarter, Not Harder
Converting a custom logo for your Pfaff embroidery machine does not require a computer science degree or decades of sewing experience. It requires the right file format, a bit of patience, and a healthy respect for test sew-outs. Start with a clean vector. Choose manual digitizing for important logos. Adjust your stitch types and pull compensation. And never skip that test fabric.
Your logo carries your identity. A well-converted embroidery file turns that identity into something people can feel—literally. The thread has texture. The stitches catch the light. The design stands up to washing and wearing. That is the power of doing it right.
So next time you sit down at your Pfaff machine, remember: the conversion is not just a technical chore. It is the creative step where your logo comes to life in thread. Take your time, learn the tools, and enjoy the process. Your machine is ready. Your logo is waiting. Go make something beautiful.